Foldable deck chairElias - October 08, 2021
Having recently moved to a new house we now have some outdoor living space to enjoy. Next to our hammock I thought a deck chair would be a good addition, so when I saw this simple design at a friend's house, I decided to give it a go. The original design is IKEA's BROMMÖ chair, which is currently out of stock in Switzerland/Europe. In a first version I used the schematic from the IKEA product page to eyeball the dimensions, which I then optimized in my second chair, also adjusting the design a bit for better stability and comfort.
I have compiled the process into a quick manual if anyone is interested in building their own chair.
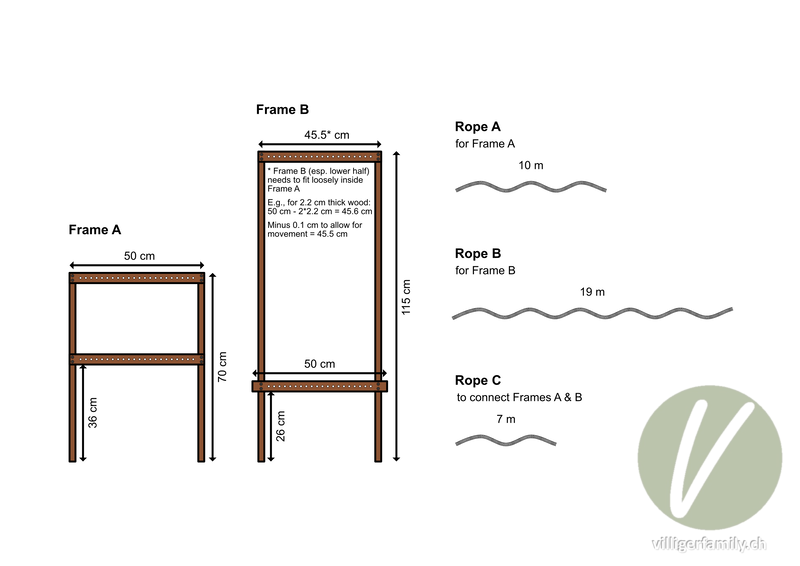
The basic design is very simple. If you want to skip my ramblings, this schematic should pretty much get you through the project.
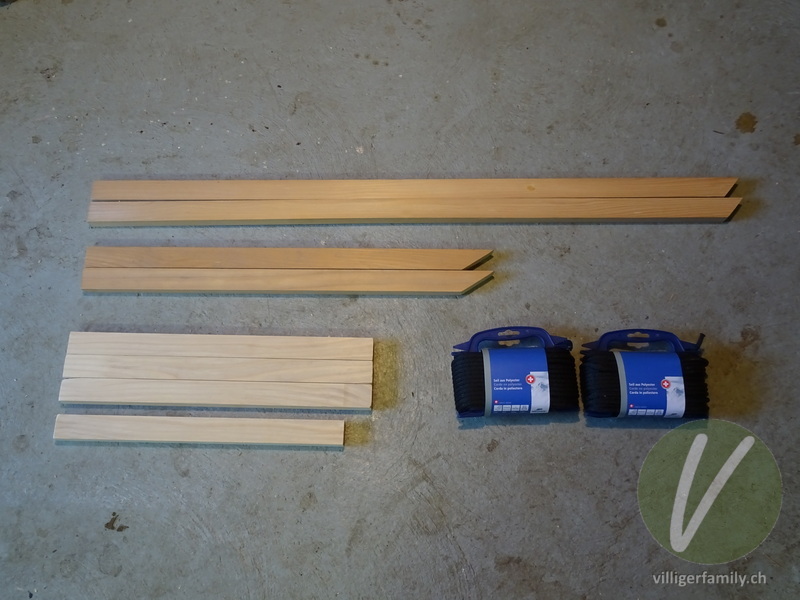
The basic list of materials needed.
Wood: I used 22 x 38 mm battens for everything. I wouldn't go any smaller than that. I recommend waiting to cut the angles pictured (on the 115 cm and 70 cm pieces) until you have the entire chair set up (they're not 45° and may vary depending on your dimensions and rope tightness).
- 115 cm (2x)
- 70 cm (2x)
- 50 cm (3x)
- 45.5 cm (1x) - adjust this length based on the thickness of your wood, see schematic.
Rope: I used a 6 mm thick, non-stretchy, nice black rope that I got for a good price at my local hardware store.
- 10 m should be plenty of rope for Frame A. This includes going between the two horizontal battens a total of 22 times and leaving enough rope to tie the two ends together in a knot.
- 19 m for Frame B, going between the two battens 20 times and tying a knot.
- 7 m to connect both frames, looping around 21 times and tying a knot.
Not pictured: Screws, wood glue. Optional: Protective paint or wood stain.

Next step: drill all the holes in the connecting (horizontal) battens. For my 6 mm thick rope, 8 mm holes turned out to be the optimal hole diameter. I drilled a hole every 20 mm (giving 12 mm between the holes), which added up to 22 holes for Frame A (top two battens pictured) and 20 holes for Frame B (bottom two). If you want to save rope you could probably space them out some more without sacrificing any comfort.
Tip: make sure you have a way to cleanly drill the exit holes (e.g., by drilling from both sides) before you try on the real wood.
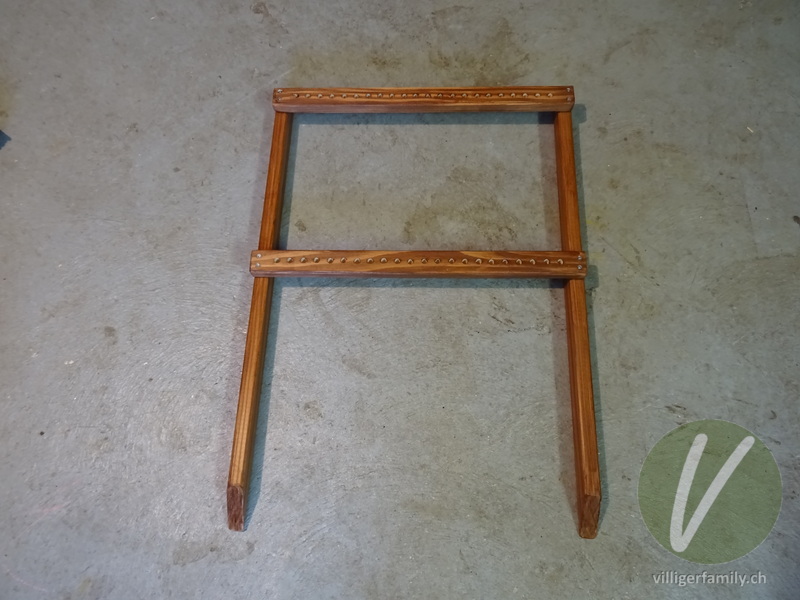
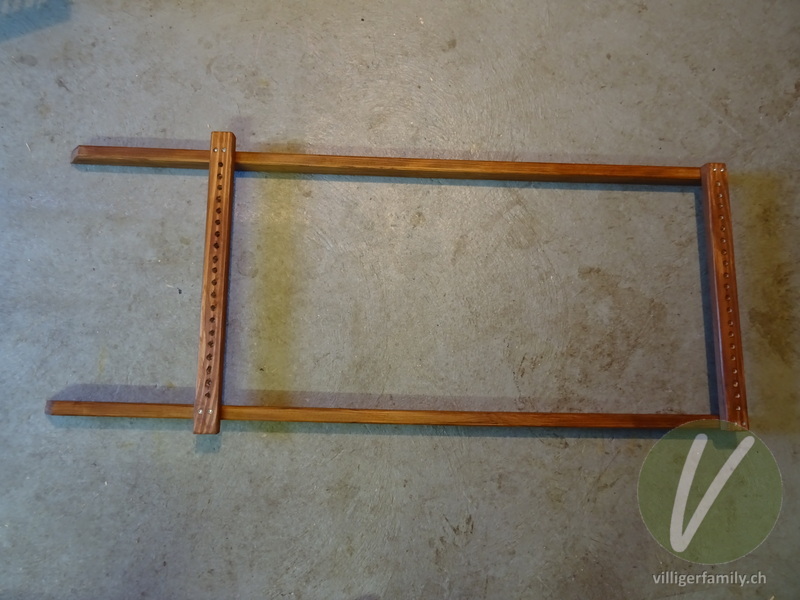
Frame A put together (and stained). The 36 cm of distance between the bottom of the frame to the beginning of the first wooden batten are measured from the long end of the angle (but you shouldn't even have cut that angle yet, anyway...).
Both battens are attached the same way, i.e. on top of instead of between the vertical pieces (design difference to the IKEA version).
I used two screws each for connecting the horizontal and vertical battens and also added some weather-resistant wood glue to eliminate rotational instability.

When choosing screw length and predrilling the holes, please keep in mind that these joints will not only have to support the person sitting on the chair, but that the 20+ lines of rope going through them will exert considerable pull even in an empty chair due to the rope's tension.
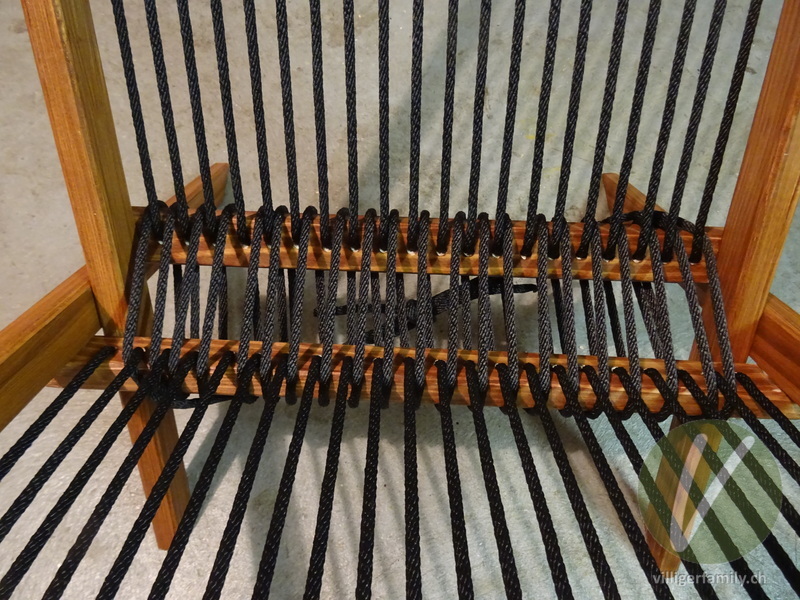
Before putting together Frame B, make sure it fits smoothly inside Frame A, especially around the height of the first horizontal batten.
The distance from the very bottom to the beginning of the lower horizontal batten should be 26 cm for this frame. Varying the 36 cm for Frame A and 26 cm for Frame B will change the overall tilt of the chair.
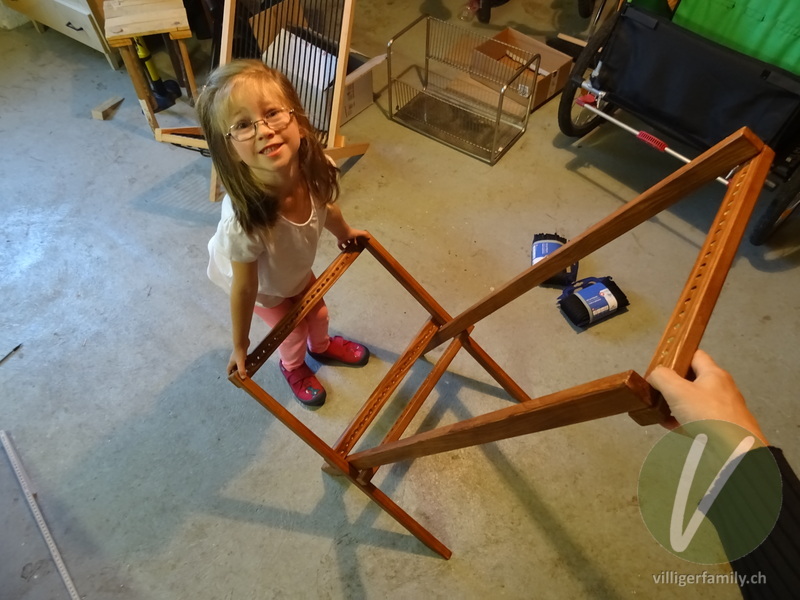
Did I mention my little helpers? Here she's helping me hold the chair to show how the pieces will fit together.

Another angle for the interlocking of the two frames.
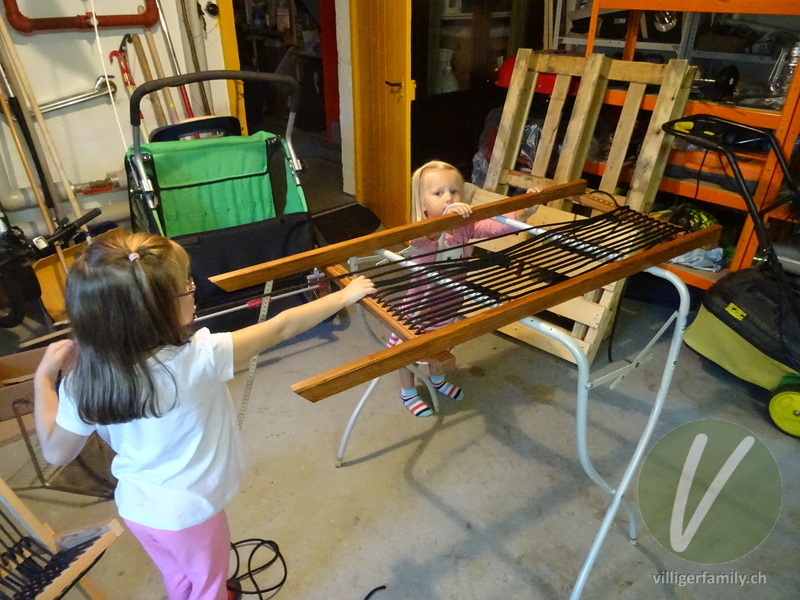
Next up: stringing the ropes (Frame B pictured). Each rope is strung in its entirety through the respective frame. We first strung the ropes loosely, then tightened them in a second run. Miriam especially loved helping with this part of the project.
It's hard to quantify how tight the ropes need to be; the best approximation is that you should probably only be using one hand to tighten them, not stand on it with both hands pulling. But I also never let off the tension from the previous line to prevent it from relaxing too much.
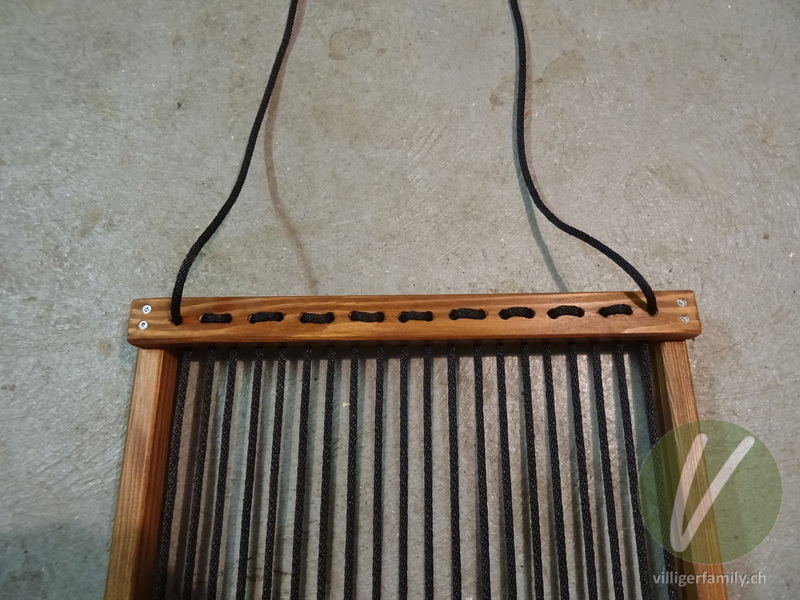
This is the top batten of Frame B, viewed from backside of the chair. The pattern on the lower batten is equivalent, except that of course the horizontal rope connections are at the outermost edges instead. This leaves both ends of the rope at the top batten if you have an even number of holes.
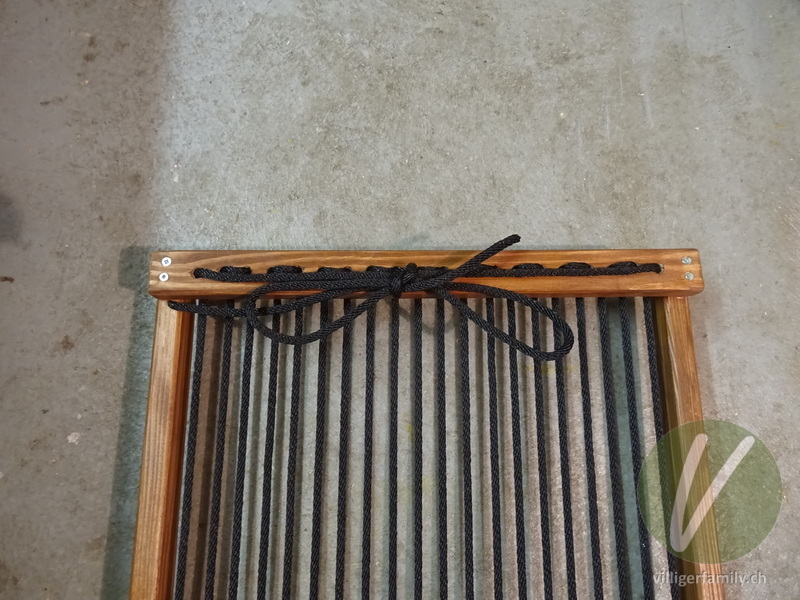
You could just as well put a knot in each end of the rope to keep them from slipping out. I opted instead to connect both ends together with a knot, giving me the option to tighten or loosen the rope later, if needed.
Rope C connecting the two frames. The tightness of this rope will determine the angle between the two frames: If it's looser the two frames will be more horizontal; if it's tighter both ends will be more upright. I made mine pretty tight, going for about a 90° angle between the two frames.
The completed chair. I found it so comfortable that I found myself trying it out probably a few more times than needed.
Known disadvantage: there's some creaking on my chair when you sit down. Reason: When weight is put on the chair the angle between the two frames expands a bit, making the battens rub against each other.
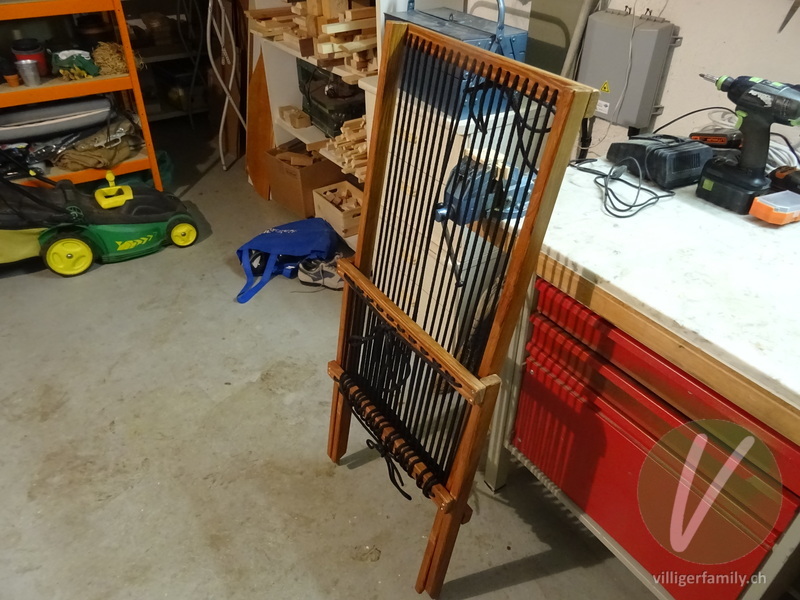
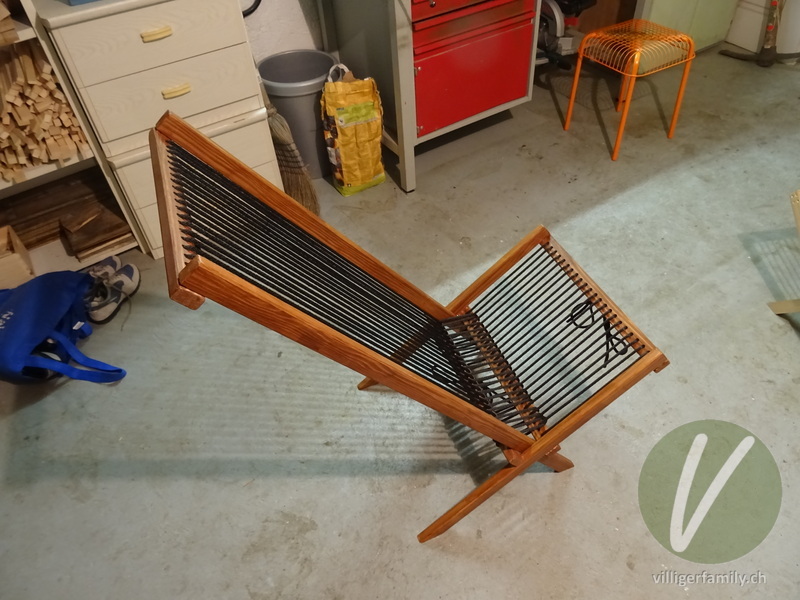
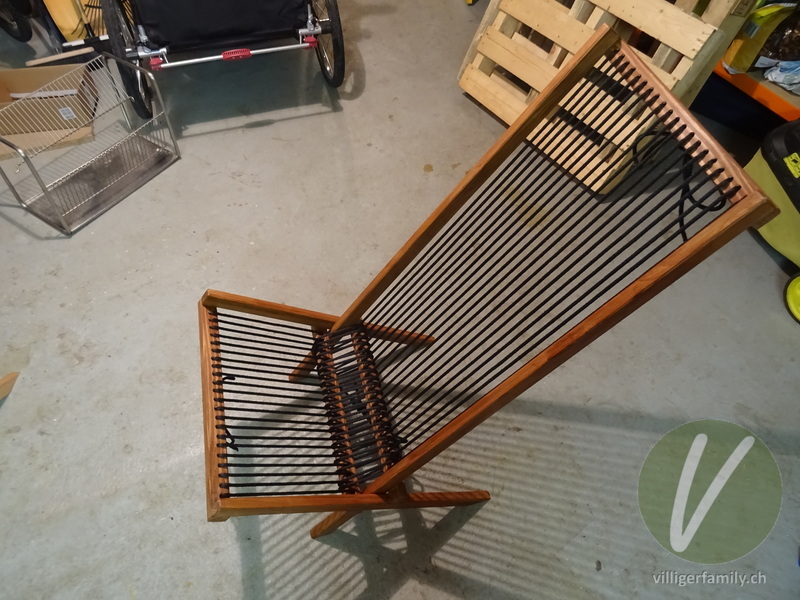
Oh, did I mention it's foldable? Well, here's the proof.
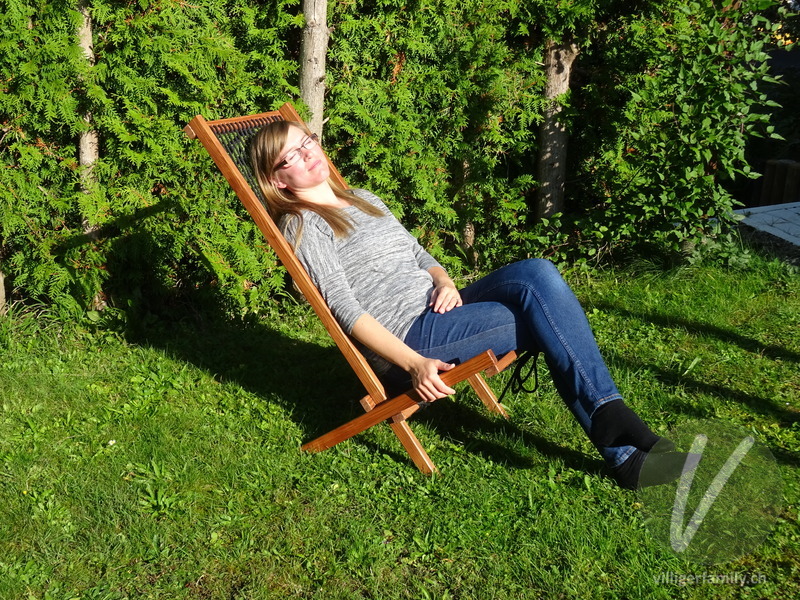
And finally I leave you with this picture of my lovely wife enjoying the chair out in the fall sun.
If this manual helped in constructing your own foldable deck chair, I'd love to hear from you in the comments or in an e-mail!