Raised-bed Garden on our BalconyElias - September 24, 2018
Besides taking care of our little daughters, this summer we had the added responsibility of taking care of some tomatoes and sunflowers that we had received from friends. Such a tough life, isn't it?
The daily ritual of watering them reminded me how gardening is such a lovely way to get a break from work & studies. When we also realized that we had an unused part of our balcony perfect for raised-bed gardening, we got busy pretty quickly:
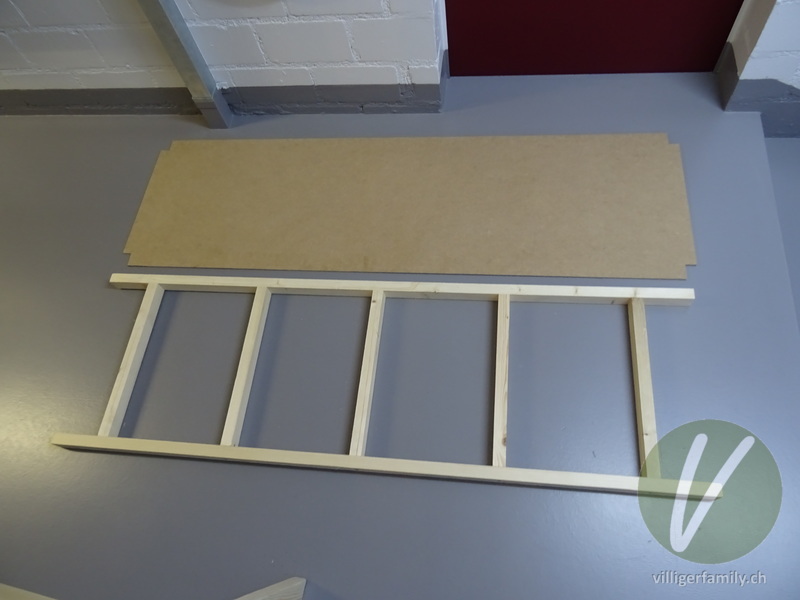
For a construction like this it is crucial to support the surprisingly heavy soil really well. This picture shows the frame that supports the soil bed. The wooden plate at the top of the picture was placed on top of the frame. The battens were all set on their edges, yet still they were starting to bend when we put soil on top - more on that later.
(Not pictured: the preceding phase of sketching and thinking through how to fit everything together)
This is one of the side walls. I used what's called "Täfer" panels, which means it's a tongue-and-groove kind of system.
All of the wood used for this project I bought from a local DIY store and cost about 50 francs; with all the other necessary items it probably totalled about 80-90 francs. Certainly saved us money, considering a flower bed that size would probably cost about 300-400 francs if bought new.

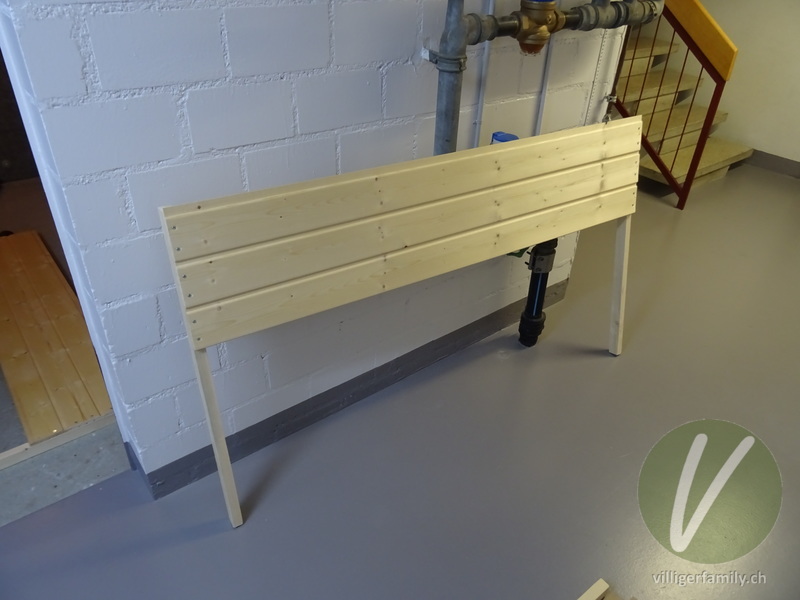
The finished basic frame, incorporating the elements from the two previous pictures. Note how basically everything is attached to the four vertical poles.
Once the frame was complete I applied one to two layers of clear varnish to try to protect the wood from the elements (and the gardeners).
Also: At this time it might be a good idea to let your neighbors know that you are not building a coffin.
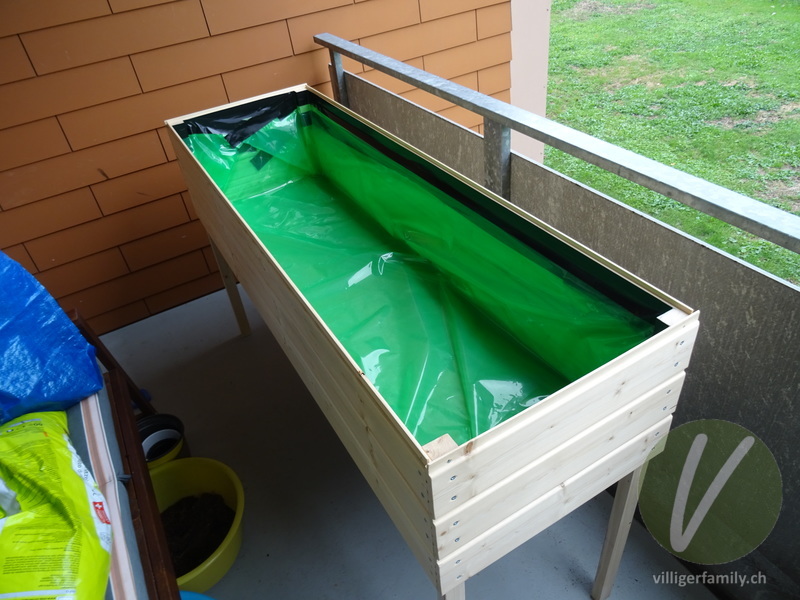
Next, we added a waterproof piece of plastic film inside the box to keep the wood separate from the soil and water. In our case we did two layers and secured it with so-called "Gorilla" tape at the top. If you secure it with tape, make sure you leave enough wiggle room so that the weight of the soil doesn't pull down on the film.
During this step, among others, I was especially thankful for my wife's helping hand.
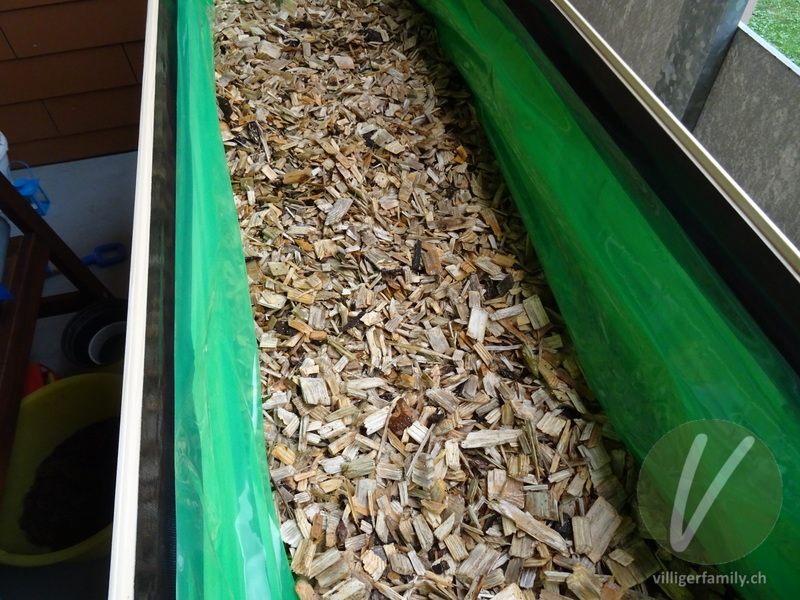
Finally, we were ready to start filling our trough! In order to prevent waterlogging, it is recommended to put some woodchips or gravel/stones at the bottom. However, this is only practical if the box is tall enough, since you still want about 30 cm (1 foot) of good soil. I added 50 l of woodchips for our total volume of about 230 l.
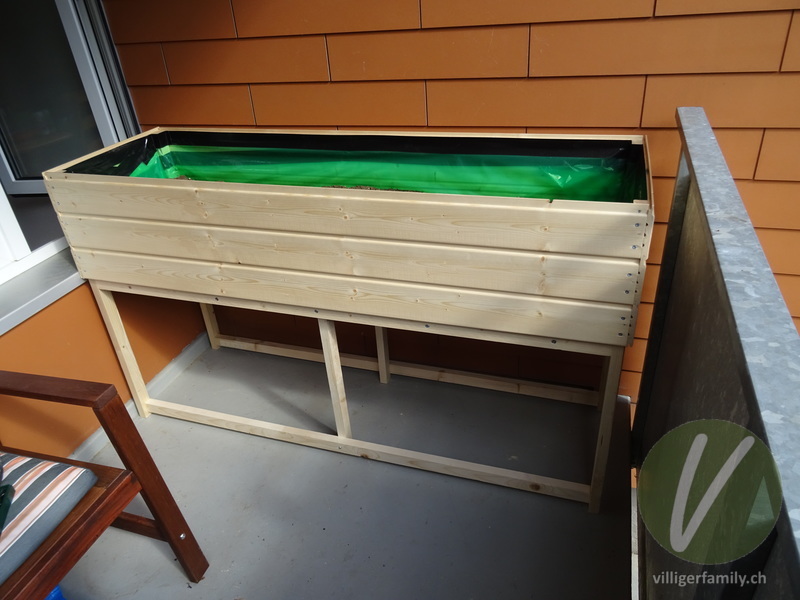
When I started filling in dirt, I soon realized that I had underestimated its weight: in the middle of the 160 cm long stretch, the battens were starting to bend. I had to go back to the store and my workshop to come up with an additional two supporting posts in the middle. Our filled flower bed probably weighs about 200-250 kg!
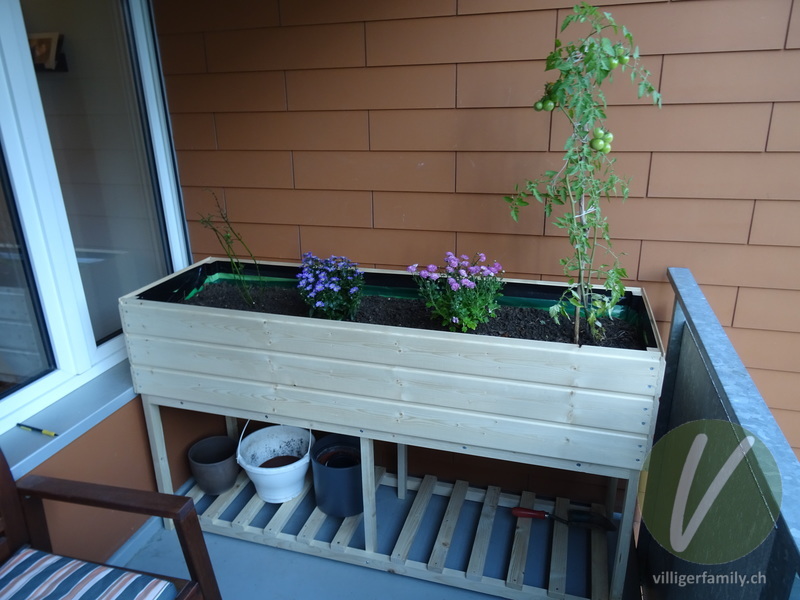
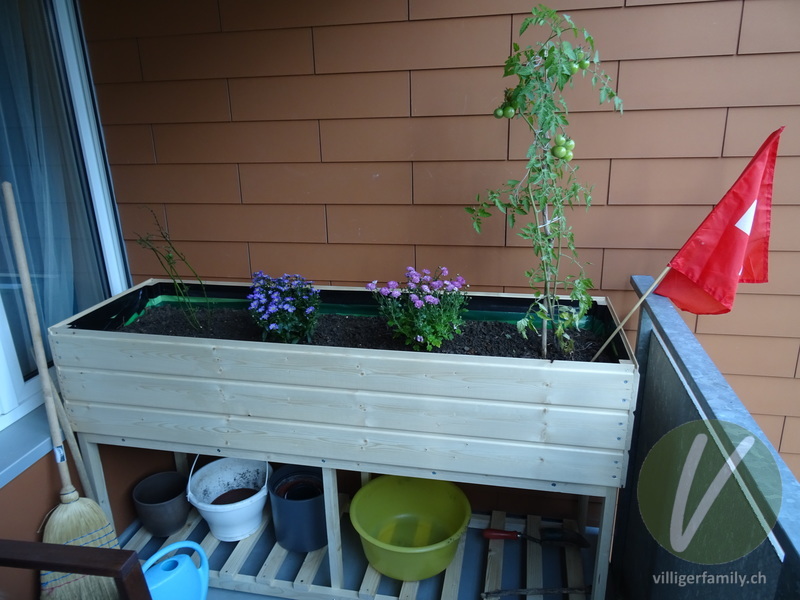
It's complete! At the bottom I added a shelf to store some gardening supplies. The main two reasons for leaving relatively big spaces between the shelf's bars are: 1) Water can flow off freely and 2) If we need to clean the floor underneath we don't have to try to move a 250 kg tub of flowers.
Sadly, gardening season is coming to a close this year, but we'll try to enjoy it as much as we can and are looking forward to adding more flowers, herbs, and maybe some produce next spring!